Introduction
Many guides to magnetic tape recording prepared by recording tape manufacturers concern themselves with how fascinating and difficult tape is to make. However, established tape manufacturers such as TDK also know a great deal about how fascinating-and, yes, how sometimes difficult-tape can he to use.
Somehow, though, there never seems to be enough time to share this "hands on" part of their expertise with the rest of the world.
Consequently, TDK Electronics has decided to make this guide a little different from the rest. Of course, it explores the history of tape and the products that TDK manufactures, which we believe best demonstrate what tape recording products are about today. But TDK's "Working Guide to Better Recordings" also probes the day-to-day experience of living with tape and using tit to its fullest potential. Some of the information our guide imparts may already be known to you, and some of its advice may come as something of a surprise. In either case, it demonstrates that TDK considers recording tape not just a product to he sold, but an experience to be enjoyed.
Some Background About TDK
It was 50 years ago that TDK scientists first developed and commercialized the use of a magnetic material called ferrite, which has become the foundation for magnetic tape products. Through the years, TDK's commitment to research and development has enabled it to expand the role of this magnetic material from use in fairly simple ferrite motor cores to highly sophisticated magnetic media such as audio and video cassettes as well as flexible computer diskettes.

TDK's technological leadership and companywide commitment to quality have enabled it to earn its status as the leading manufacturer of audio and video recording tape and related accessories continues in the TDK tradition of quality and reliability in state-of-the-art recording technology. The tapes are available in two defined levels of worldwide. Today, on its 50th birthday, TDK boasts the industry's broadest range of technologically advanced audio and videotape products designed to meet every need, from those of the most demanding professional studio to those of your living room.
TDK's products are distributed and used all over the world. For TDK, continued leadership in all phases of the magnetic recording field is not merely a matter of good business. It is a matter of pride and tradition.
Our current line of audiotapes performance-the Professional Reference Series for professional and audiophile applications and the Reference Standard Series for non-professional uses.
Keep Your Deck Clean
As a vital first step, be sure that your audio cassette deck or open reel recorder is demagnetized and clean. For cassette decks, TDK's battery-operated cassette head demagnetizer HD-01 is a quick and effective demagnetizing device.
The unit fits simply into a tape deck like an ordinary cassette. A hand-held demagnetizer like TDK's HD-11 will do as well if used carefully. Remember the job requires close attention. The HD-1 I features a plastic-covered pivoting tip that discharges magnetic buildup, even on the most inaccessible heads as well as to the guides and support structure of the transport.
There is no substitute for careful eyeball inspection. TDK's HC-1 is a convenient cleaner for routine maintenance and provides an effective way to keep recording heads free of oxide buildup, dust and dirt. Its use is recommended after every eight hours of play, and it is also packaged in a cassette configuration.
Before every recording project, use cotton swabs touched up with a few drops of solvent (pharmaceutical alcohol is safe with virtually every modern machine, but be sure to check with the manufacturer if in the slightest doubt.) Pay especially close attention to the areas where capstan(s) and pinch rollers(s) make contact. Put the machine into the "play" mode and apply your swab to the right side (where the tape feeds out) of the assembly.
Keep at it until the swab conies out absolutely clean. Don't let cotton fibers break loose from the swab and take a trip through the mechanism. When you're finished, you should he able to see cleanliness which, in this instance is definitely next to perfect recordings.
Set Up Your Tape
At this point you're clean and loaded with tape (exactly which TDK tape is a subject we'll get into later). You can, if you wish, run the tape through the transport for its entire length (at PLAY speed, and with record mode engaged). This is an old professional practice, unnecessary with many modern tape formulations such as TDK's, but it does give the tape a bit of polish and ensures that the tape pack is winding smoothly on your machine.
If you're using a cassette, flip the tape and start your recording on side B. Don't go into fast rewind, or you might pack the tape too tightly or disturb the careful alignment that a wind at play speed will give you. While you're working with side A, and if you have the patience, it's not a bad idea to record a minute or two of actual material (from FM. or anything else you've got) using normal recording practice. Then go back, using the machine in RECORD with no input, and see if you can successfully erase the signal you just laid down. If you can't, there are possibilities of machine/tape incompatibility.
If you can; you're okay so far. You should be doing all this, incidentally, as close to the time and place that you want to make your "keeper" recording as possible. Just carrying a loaded tape machine across the street can, occasionally, have important effects on the winding integrity of your carefully prepared tape pack. By the way, TDK carefully inspects each cassette and open-reel tape before it leaves the plant to ensure continual smooth-running performance.
Capture Your Program
Now to confront the actual program material, and the ways in which your recording level meters and controls can assist you in capturing it. In this, there is one rule, and only one: you always want to record at a high level, but not so high that you can hear the effects of distortion and, in the case of cassettes, especially, the high-frequency losses characteristic of tape saturation.
Let's discuss the subject in a little more detail. First of all, the main idea with a modern tape of high quality is to avoid the distortion and/or high frequency losses that will occur if your recording levels go "over the top." Too low a level will result in more noise than is strictly necessary, but the noise-reduction facilities provided in all cassette decks with pretensions to quality should keep you out of serious trouble. Otherwise, a level on the tape that is lower than the maximum achievable is no problem at all. You just turn up the amplifier to compensate.
However, be constantly aware that distortion and high-frequency losses that wind up on the tape can he compensated for by nothing. They're permanent and ineradicable. The wise recordist therefore avoids incurring them at all costs.
Considering the vagaries that arise in interpreting the readings of record level indicators (see the following section), it is essential that the recordist learn to use his ears as a guide. A bit of training is required for this, and the best way to proceed is to select a very high level musical source (big crescendos on LP should be good, and the same on CD even better; avoid using FM for this purpose) and experiment.
A Word About Meters
Are recording level meter systems then useful at all? Of course. Although it would take many years' experience to learn how to record well with meters alone, they do remain indispensable guides in charting your progress and getting you back to where you were a moment or a week before. It's difficult to generalize about meters because they differ so much in type and calibration, and their readings don't necessarily mean the same for one tape as for another.
However, as the general rule, modern cassette decks are equipped with either peak-reading or VU meters, and the most important thing to keep in mind about this distinction is that recording levels for peak-reading systems will, with transient material, indicate levels that read roughly 7 dB higher than VU types will. Determining which meter type your machine employs is not always obvious, but after a hit of experience you will be able to distinguish between them easily just by watching their behavior with actual music material.
Again, this is not terribly difficult, but it is exacting. The more experience you gain with different music, machines and tape, the sooner you'll be able to copy quickly with a change in any or all of the three, and to use the meters in a fashion that will let you know what you'll probably hear in the finished recording.
Most cassette decks employing Dolby noise reduction bear markings on their meter-system faces indicating Dolby level, which by convention corresponds to a recorded level of 200 nano-webers per meter (nW/m) on the tape. The Dolby indexes are placed at +2 dB in most cases, but occasionally they turn up at 0 or even-2 dB. What this information tells you is that, in general, it may be safe and even advisable to use correspondingly higher recording levels on the average with the first type of machine, and to he appropriately conservative with the others.
However, this rule can only be approximate, and the actual results achieved w ill depend greatly on the overall recording characteristics of the machine, and even more greatly on the performance capabilities of the tape. Naturally, we expect you'll find TDK tape able to tolerate higher recording levels without strain, and to exhibit higher maximum output levels before distortion occurs, particularly at high frequencies, than many other tape formulations.
Today, tape is so good that level manipulations are unnecessary except in the most critical circumstances, when the recordist feels instinctively that he can't do a satisfactory job without resorting to them.
Tape is also good enough to render the slightest clumsiness in a gain-riding effort immediately audible and objectionable. On the whole, it's probably, better to set levels correctly for the recording project at the outset, and not meddle with them afterward. For this application, the use of metering systems is reasonably straightforward, if not completely illuminating.
---------------
Recording from LP's
It takes only a few seconds to visually inspect the playing surface of an LP and discover where the highest recorded levels are.
These should be test recorded in advance, with very aggressive recording levels (don't worry; nothing will break), to determine the absolute maximum level your recording system will tolerate before audible distortion/saturation occurs. That's the optimum level.
It will differ from LP to LP, and you'll find, if you're using cassettes, that the highest levels of high-frequency information will be the most useful guides. Use your meters to learn what these levels look like, and take mental notes accordingly. They won't teach you everything about recording, but they'll be a good start.
Always listen as you're watching the meters, so that you can keep track of the kind of signal they most actively respond to.
Certain meters will let you know with vigorous activity when a crash cymbal is struck. Others will barely move. All will strongly register the presence of a deep organ pedal, but experience will probably teach you that you can get away with surprisingly high levels of deep organ pedal if they're not accompanied by huge outbursts of brass and/or that inevitably worrisome cymbal crash.
Beyond that, there's little to do except punch the RECORD button and go, except for a subtle problem that occasionally crops up. Some record-playing systems become unstable when encountering severe record warps, and will deliver a signal too low in frequency to be heard per se, but strong enough to overload a recording system to the point of gross distortion, even though the rendition might sound perfectly acceptable when played with no attempt made at recording it. The symptoms, heard when you play back the recording just made, will normally be a shocking "garble" distortion recurring at the rotational rate of the record, and eyeballing that rate while listening to the result is what will let you identify the difficulty. A filter introduced somewhere between turntable and recorder will fix you up temporarily, but the only real fix has to be applied at the record player itself.
...and from FM Radio
Most of the foregoing still stands, except that, in theory, you should be able to use the same record level for every FM broadcast you'll ever have access to; unless, of course, the signal is too weak to achieve full limiting, or you change tuners, recorders, or tape. The reason is that broadcast strength is restricted by law, and while virtually all competent broadcasters use all the strength they're allowed to the maximum, relatively few of them cheat enough to become conspicuous, and the cheating could never amount to more than a dB or so.

Therefore, your best procedure is to find the loudest, most obnoxious source of high-energy, compressed rock/disco in your locality, set your recording levels to the maximum before you hear loss of high frequencies, and use that recording level for everything thereafter, including the most delicate presentations of clavichord performances. You have to depend on the technician in the broadcast studio to take care of the rest. You don't have enough control to do much more.
An exception exists in the case of stations broadcasting Dolby FM. Because they're probably quality-conscious, their signal should be pretty good-good enough to be worth trying some tricks with that this article cannot, alas, be long enough to detail. But unless you're prepared to research and undertake serious technicalities, the best advice would be to treat Dolby FM broadcasts as you would any other (although, of course, decoding them appropriately if your tuner has the means to do so).
---------------
Copying Compact Discs
Some have said it can't he done, but you can indeed copy the content of a compact disc onto a cassette with excellent results. The most significant difference between dubbing an LP and dubbing a CD is that you can't locate the CD's highest recorded levels by eye. If you don't know the music (and even if you do), you're going to have to work your way through everything you want to record by ear and meter, test recording the more difficult passages as you go along. This may sound tedious, and will he the first few times, but CD's are restricted by technology to a maximum level, and you should begin to get a feeling of what that means for your recorder in fairly short order.
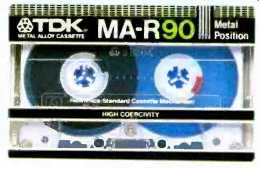
CD's are indifferent to frequency-versus-level considerations, so expect a few nasty surprises. But also expect a few pleasant ones. At worst, recording from a CD is not any more difficult than recording from a live performance. TDK's award-winning H-XS tape, the first metal formulation which records in the high bias position, is particularly recommended for recording from digital discs, as are TDK MA and MA-R metal tapes.
HX-S, the first metal tape for the high-bias position.
Live
But not always, and it remains generally true that, for live recording, cassettes may not he the medium of choice. Their great advantage is portability, which is so persuasively al tractive that even professional recordists on their days off will walk around with a personal-portable cassette recorder just to see what they can pick up from clubs and street musicians. Also, demo tapes, made so a record producer can get an idea of what an unknown band sounds like, are very often in cassette form. However, for commercial release purposes, reel-to-reel still owns the business, largely because of its greater headroom and “editability”.
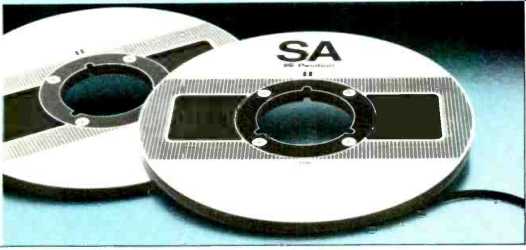
Live recording is, of course, much too large a subject for treatment in a few paragraphs. But all the above guidelines generally apply. However, you should be aware that TDK offers some exceptionally advanced tapes for the open reel format, including SA (Super Avilyn) EE tape made for high-end component systems with EE (extra efficiency) 1/2-speed position and GX-Pro Quality for standard speed recordings.
The Right Audio Tape
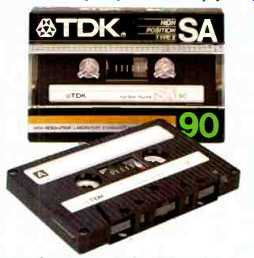
TDK's NEW IMPROVED "SA" SUPER AVILYN audio cassette is the
newest generation of TDK's premium "SA" formulations.
SA, which made its debut nearly 10 years ago, continues to lead the way in premium high-bias audio tapes.
Different tape formulations and types co-exist, not only to give you the most cost-effective choice for your needs, but also because there is such a huge population of recorders in the world that no one tape, no matter how good, could possibly be perfect for all of them. With all these choices, how do you pick the one to fit your deck? First, right away, we have to understand what "fit" means. Take some FM interstation noise and record it at a level of perhaps-10 dB on the meters. If the ideal "fit" is there, the recording on playback should be an audibly perfect facsimile of the original. In practice, the recording will tend to be a little brighter or a little duller. This is no necessary reflection on the quality of either your tape or your machine.
It simply suggests that the two don't quite fit each other, and that there will therefore be some mistracking problems with certain popular noise-reduction systems, and possibly a few other difficulties, not obvious at first, but upsetting to discover down the line.
When you don't have a precise fit, the readiest tactic is to try another tape presumably, but not necessarily, from the same IEC group you've selected for your application. (Normal Bias, Type I; High Bias, Type II; or Metal Bias, Type IV.) If the results of the FM-noise test are discernibly different, even though not perfect, there is cause for optimism, because your recorder is showing signs of being in good condition. If every tape you try is, say, a little duller than the original, the time to think about repairs or a new machine has come.
When you get a satisfactory fit (and you might very well get it with a number of tapes), then the sorting for actual performance quality begins.
Record all the tapes, at very high record levels, with musical test passages that include both very loud cymbal activity and very soft material. Listen for lack of distortion with the former and lack of noise with the latter. Do not hastily jump to conclusions for one tape begins to distort at levels of +3 dB while another seems impossible to overload. Select your levels for what seems to achieve the best (or avoid the worst) from each individual tape, and then listen to the results as if you were just playing music for enjoyment.
With some tapes you'll be conscious of more noise during quiet moments. With others you'll be aware that distortion on high-level passages is more difficult to avoid than you suspected when you made the recordings. On a number, you'll discover that cymbals you thought you were capturing fully have somehow become more subdued.
What you'll learn from this test, if carried out exhaustively, will tell you more about the right tape for your machine than ten thousand more words. It should not, however, dissuade you from performing the same test next year, and the year after, as new tapes emerge. AT TDK, the understanding of the tape/machine interface is acute, and a tape that fits most machines and otherwise performs with true distinction is probably more easily found within the TDK product line than any other.
Why Two Levels of Tape?
TDK has developed the two reference levels to help users evaluate and choose the best tape for their particular needs. Although both levels have been developed using the same concern for quality that goes into all TDK products, there are differences in the performance capabilities of each product that make it best suited to more specific applications.
The Professional Reference Series, with a variety of products to meet all professional requirements, represents the highest level of achievement in recording-tape technology. Each tape sets a standard for sonic excellence. That's one reason they're the choice of the most discriminating audiophiles as well as most hardware manufacturers, who use TDK as a reference for bias calibration.
The TDK Reference Standard Series provides outstanding premium quality for a wide variety of recording needs. Each cassette is a product of TDK's advanced tape technology and offers maximum reliability, performance and value.
About Bias
It was discovered in tape recording's infancy that a constant ultrasonic signal applied to the tape along with the audio signal to be captured, vastly improved the linearity of the recording process and optimized the sensitivity of the tape for audio frequencies. It was then discovered, that different tapes benefitted most from different bias strengths.
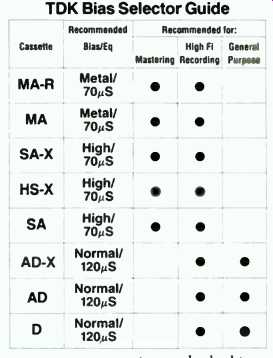
Your present tape recorder undoubtedly has a tape-type switch that adjusts the machine for the tape formulation you wish to use, but that doesn't guarantee that the IEC Type II position will be right on the button for every Type II tape you'll ever buy. Minor variations exist between brands of tape, and even between production batches of the same brand. The "facsimile recording test," discussed in "The Right Tape" section of this article, is the logical way to find out if the bias provided by your recorder is correct for the tape you are using. Employ that test faithfully.
There is something more that it's useful to know, however. For various reasons, some tapes are less sensitive to the effects of minor bias errors than others, and this can be a comfort when you're forced to choose between unfamiliar tapes for a rush recording project. For example, the effect of under-biasing a tape will be both a rise in high frequencies and an increase in distortion and modulation noise. There's not to much that can he done about high frequencies and distortion, but if the tape is carefully designed for physical and magnetic uniformity such as the way TDK tapes are, the modulation noise will he low to begin with, and it won't be subject to catastrophic increases when the recording conditions are not quite right.
The importance of a good tape is an overriding consideration for any recording project, but it is an especially crucial consideration if there's any doubt at all about the match between bias and tape characteristics. If you ever encounter such doubts, choose a premium tape such as those by TDK which excels in overall characteristics. These tapes will come through for you, no matter what your application.
above: TDK Bias Selector Guide
VCRs and the Audiophile
Almost all audiophiles know more about VCRs than they think they know. Even if they don't know all of the theory, they know the basic rules: The higher the frequency response needed for a signal, the faster the tape must travel past the tape head; a signal that is close to the saturation point of the tape will be less troubled by noise than a signal recorded at a lower level; etc.
Video signals do require a very large bandwidth of at least 3 megahertz for a picture as good as a standard color TV, so the tape-to-head speed must be in the order of 6 meters per second. To achieve such speeds, it is more efficient to move both the tape heads and the tape. One way of doing that is to put the heads on a rotating drum. The color signal is broken into two parts: color and brightness. In consumer VCRs, the brightness (luminance) is put on the tape as an FM signal at about 3 to 5 megahertz and color signal (chroma) is recorded as an AM signal at about 600 kilohertz using the FM luminance signal as bias. The exact frequencies are slightly different in Beta and VHS recorders, the two widely used consumer formats.
When you buy a machine, the characteristics of the machine are already set but you can still exert some control over the quality of the recordings you make by the tape you select.
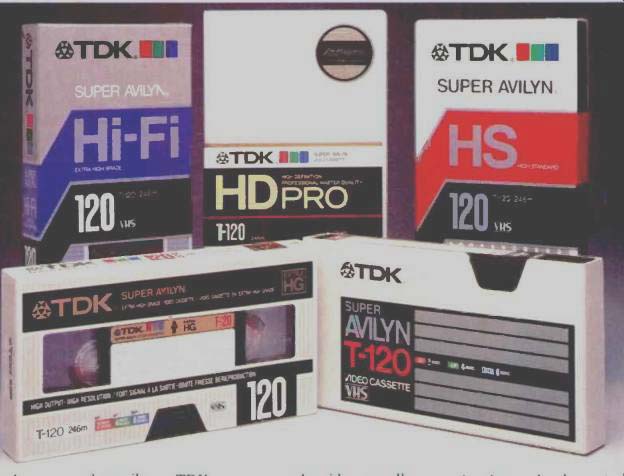
It is there that TDK's 50 years of experience in making magnetic tape helps you. Audiophiles are already accustomed to the idea of choosing from many types of tape for the best match between the material to be recorded, the recorder speed and the type of tape. TDK offers five grades, in both Beta and VHS formats, and the best one to use for a particular task can be made on the basis of manufacturer, application, and cost.
That the quality of the tape you get depends on cost should come as no surprise. Since you seek the highest quality, buy the best grade you can afford for your most important application. For video recordings chroma and luminance, (usually called video) S/N, and the dropout count are the most important criteria in choosing a grade. The S/N determines the graininess of the recorded picture and dropouts (areas where the magnetic particles are missing) cause the white or black streaks of missing picture on playback.
TDK tapes are renowned for their already low dropout count which gets even better as the grade gets higher.
The S/N also improves as the grade gets higher. Each step-up grade offers a S/N about 2 dB better than the one below it. There are similar increases in audio quality as you step up. So the difference between the lowest and the highest grade is about 10 dB. The grades we offer (from lowest to highest) are: Standard Super Avilyn, HS High Standard, EHG Extra High Grade, Hi-Fi, and HD Pro.
PCM Digital Audio Recording and Your VCR
For some years now recording audio in digital form, PCM (Pulse Code Modulation), has been available in recording studios. Two years ago it became available to the audiophile with the introduction of the PCM adaptor for video recorders. PCM samples the audio signal 44,000 times a second and records that instantaneous voltage as a number in digital form. Those numbers have 14 or 16 bits each in their binary form and whatever machine is used to record them must have a frequency response greater than 16 times 44.000 at minimum. No recorder commonly available to the videophile has that type of frequency response except VCRs, so they've been pressed into double duty.
As always, the system is not perfect. For perfect replication the number must be identical, but two problems arise. First the numbers may be misread, mutilated or mistranslated, but the encoding scheme allows for elaborate error correction.
However, the numbers may be entirely missing because of dropouts on the tape. There are similar error correction devices (dropout compensators) in a VCR which minimize the effect of dropouts, but they cannot he relied upon to function effectively for digital audio purposes. So the only reasonable solution is to use a tape with the lowest dropout count. Over the years, TDK has earned the reputation for the lowest number of dropouts.
In PCM recording uniformity is of paramount importance. The digital information must he a constant uninterrupted stream with l's always having the same value and 0's must maintain theirs. In spite of how critical these values arc, the uniformity of TDK's tapes ensures that the signals will maintain their vital integrity.
TDK tapes are made with unusually small magnetic particles that permit a higher number of them to be contained in the same volume than with other tapes, yielding a generally higher BET value. This dense packing of the magnetic particles also yields a higher RF output, further reducing the probability of erroneous reading. Normal noise levels are not likely to cause erroneous readings, but a higher signal level makes such readings an even more remote possibility.
Uniformity from tape to tape throughout production is also a TDK strength. The same high performance level is maintained with each new batch of binder (particles, adhesives. etc.), and the result is a tape of consistent properties from batch to batch. The result is predictability.
You can be sure of the performance of a tape with the TDK name on it.
You may make PCM recordings at any VCR speed, but the fastest available speed, Beta II or VHS-SP, will yield the best results. The reasoning is simple. With the tracks closer together, actually overlapping, at VHS-SLP speed the likelihood of having the same dropout affect adjacent tracks is greatly increased.
Among TDK tapes, the higher grades have the lowest dropout counts, highest outputs and highest BET values. (The higher the tape's BET value, the more particles packed per square inch, which means improved clarity.) They also have lower S/N. As with video, use the highest grade you can afford for digital recording. But remember that every dropout is a problem. Choose the grade of tape for digital work carefully, based on how critical the material you record is. HD-Pro has the fewest dropouts among TDK's tapes, and with TDK's EHG Hi-Fi a close second, both are an admirable choice for the critical task of recording PCM.
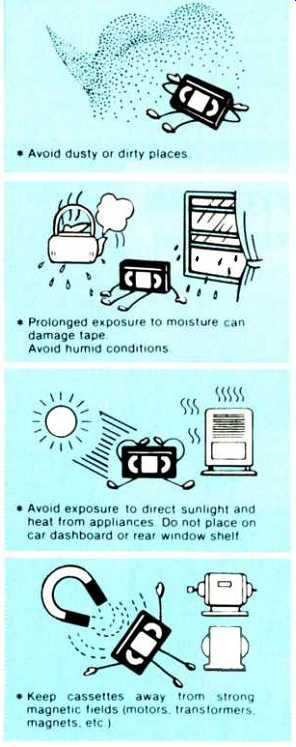
Care of Your VCR and Tapes
In addition to buying the best grade of tape for a specific application, you can ensure that you get the best recording possible by keeping the VCR in the best working condition. First protect it from dust by covering it. If a plastic cover is not supplied with your VCR, buy one. VCRs are also sensitive to heat and moisture, so keep yours away from radiators and direct sunlight; and if you can control the humidity, keep it low. Both VCRs and tapes like to he kept at temperatures about 60 to 70 degrees Fahrenheit and at a relative humidity of about 50 percent. Both are also affected by magnetism, so don't put them on TV sets or near motors or speakers.
Last, clean the heads periodically. You may use one of the cassette-type cleaners, but using solvent and swabs works better. Use only materials in tended for cleaning VCRs and follow the instructions with those cleaning kits. Above all pass the swabs across the heads horizontal y as indicated in the instructions with the cleaning kits. If you rub the heads vertically, you'll put them out of alignment.
Other precautions that ensure consistent high performance are:
1. Take up any slack in the tape by turning the hub on the bottom of the cassette manually until the tape is just snug.
2 Allow the VCR and tape to adjust to temperature changes after transporting them-about an hour.
3. Inspect cables periodically for fraying and signs of internal damage (soft spots and kinks). Also make sure that connectors mate snugly.
4. Follow the hardware manufacturer's recommendations on cleaning, placement and air flow as outlined in your owner's manual.
Capture Your Program
Using the same passage for each sequence of the test, make a recording at a moderate level (perhaps around 0 dB on peaks) and listen carefully to it. It should sound fine, if perhaps a hit noisy. Then, using a recording level that is one or two dB higher, record the passage and listen again. Raise the level a bit more and do the same, and soon, until the point arrives when you can hear the raspy harshness of distortion and the dulling of the sound on high-level cymbal material. At this point you've gone too far, so back off on levels to find the point where acceptable becomes unacceptable.
This is about where you want to set your final record levels for music of this type; but if you find you can't quite identify the precisely right point by ear, err on the side of undistorting (that is, lower) levels.
Incidentally, this experimentation will also teach you the value of a good tape (such as TDK) in its properties of forgiveness. A small error in setting levels will he tolerated by such a tape because the maximum output levels afforded, especially at high frequencies, provide a cushioning margin to keep you out of trouble when musical events get a little more violent than expected.
Why Five Different Video Cassettes?
TDK's VHS and Beta video cassettes, ranging from standard cassettes for most video applications to the highest-quality HD-Pro for professional-level recording, all use TDK's world-renowned Super Avilyn magnetic material for precise performance and reliability.
The five levels of formulation grades have been developed to meet the needs of all video applications and to enable users to choose from among a range of products so they can get the most for their money.
Each cassette mechanism is built to a tolerance 2 1/2 times that of industry standards and is microscopically checked at almost 2,000 different points to assure you of perpetual, error-free performance.
These specially designed cassette mechanisms consistently maintain proper tape tension, preventing jamming and snapped leaders. They also provide optimal tape-to-head contact, which prevents skewing, jitters and dropouts. Stainless steel pins support the guide rollers for ultimate accuracy, providing better alignment and tape-edge protection than the plastic pins used by some tape manufacturers. In addition, TDK even builds its own video cassette shell halves to micron tolerances for an exact top and bottom match. That's precision. And it all adds up to give you the best picture possible with trouble free performance.
Need further information? Contact Bob Fontana, Customer Service Department, TDK Electronics, Box A.M., 12 Harbor Park Drive, Port Washington, NY, 11051.
TDK
(Adapted from Audio magazine, Jan. 1985 )
Also see:
TDK--Portrait of a Company in Fast Forward (Aug. 1984)
TDK Electronics -- blank audio cassette tape (ad, Nov. 1978)
= = = =