THE BASIC EQUIPMENT
The best opportunity for the beginner in broadcasting will be as a combo operator. To be eligible you must have a license or a permit and be able to operate the equipment effectively. You will work in a studio called master control. This is normally a small room with just enough space for the operator and the audio equipment. The audio equipment consists of a console, turntables, tape recorders, microphones, and possibly a patch panel. You will be seated in the middle of a "U" shaped configuration with all of the equipment within easy reach. In the beginning you will find operation of the equipment difficult and perhaps confusing, but you will learn to work with it just as you were able to learn to drive a car.
Eventually the physical operation will become second nature, and you will be able to give full attention to what you are saying without having to think about which button you are going to push.
You may be acquainted with much of the equipment already. Turntables, tape recorders, and microphones are common appliances in many homes. If you own hi-fi equipment you are perhaps already familiar with the fundamentals of studio operation. Professional broadcast "gear" may be different in several respects, however, and it is those differences that we are going to discuss in this Section. One basic difference is that professional equipment is usually low impedance while your home equipment is probably high impedance. Impedance is the electrical property that one piece of equipment "presents," as load or as source, to another piece of equipment to which it is connected. The high -impedance micro phone, for example, that you use with your home tape recorder would not be compatible with the low -impedance input circuit of a professional tape recorder. In fact, even the connecting plug would probably not match. Let us look closely at each piece of equipment, examine its function, and see how it works. Understand, of course, that the explanations and descriptions that are offered here are only preliminary. You will only become familiar with the equipment by getting actual "hands-on" experience. After reading this Section, you will want to sit down in front of an audio console and see for yourself where the switches and knobs are located. You will note that everything is connected to this basic piece of equipment. The volume for the microphones, turntables and tape recorders are all controlled by knobs that are called "pots"-short for potentiometer-mounted on the console. There will also be switches that will turn on or off the signal coming from each unit. FIG. 1 shows a master control room.
MICROPHONES
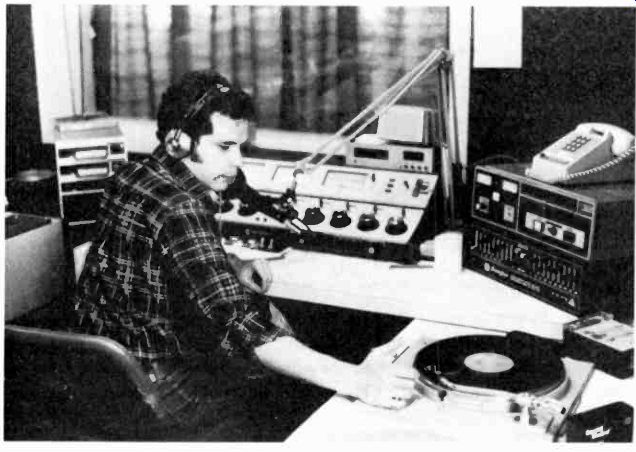
FIG. 1 Master Control. (Courtesy KMEL.)
The first unit we want to consider is a tool that is as fundamental to an announcer as a hammer is to a carpenter-the microphone. For many people it is a fearful instrument, but as a professional you must under stand it and be comfortable using it. There are many different types and styles of microphones: They differ in quality, construction, and performance. You can purchase some microphones for under five dollars; others cost several hundred. The common function of all of them is to produce tiny voltages which vary according to the sound waves that impinge on their moving elements. In terms of construction, there are three different types:
1. In a ribbon or velocity microphone the moving element is a thin, metallic ribbon, vibrating within a magnetic field.
2. In a dynamic or pressure microphone a wire coil attached to a diaphragm vibrates in a magnetic field.
3. In a condenser microphone the plates of a condenser constitute the vibrating mechanism.
The differences in sound quality produced by the three systems are very subtle. You may want to experiment with all three to see which one sounds best with your voice. The most widely used is the dynamic mike.
It is versatile and more durable than the other two. Ribbon and con denser microphones are very sensitive and sometimes more flattering to the voice, but they do not sound well out-of-doors or when the performer is working too close. But these differences are relatively minor. The most significant distinctions to be made among microphones have to do with their directions of sensitivity-their so-called "pickup patterns." There are three major patterns, with an infinite number of gradations from one to another.
Omnidirectional
An omnidirectional (or "non-directional") microphone (FIG. 2) is one that picks up from all directions. It is good for recording several different voices as you would have in a group discussion. But it picks up noises in the background too. The more people you have around one volume. As you increase the gain (volume) you also increase the ambient sounds. But if you have only one microphone and want to pick up several voices, the omnidirectional mike is the kind to use because it does not have to be aimed every time a different person speaks.
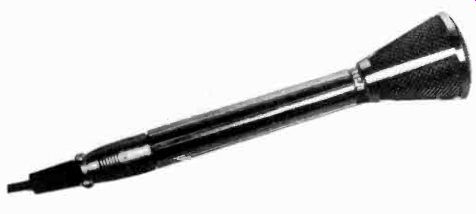
FIG. 2 Omnidirectional microphone. Model BK-14. (Courtesy RCA.)
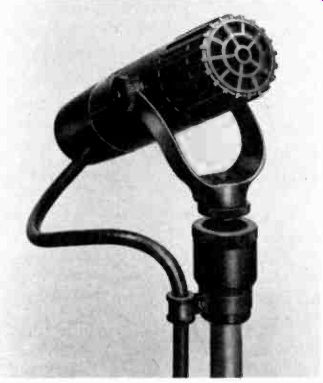
FIG. 3 Unidirectional microphone. Model BK-5. (Courtesy RCA.)
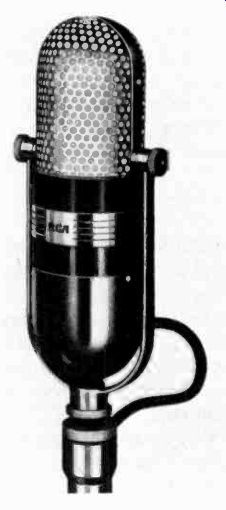
Fig. 4 Bidirectional microphone. Model 77 DX. (Courtesy RCA.)
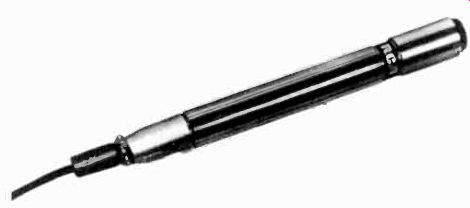
FIG. 5 Hand-held microphone. Model BK 16. (Courtesy RCA.)
Unidirectional
A unidirectional (or "directional") microphone (FIG. 3) picks up sound mainly from one direction, suppressing the sounds from the back.
The most commonly used unidirectional mike has a cardioid (heart-shaped) pattern. The announcer can talk in the 180-degree radius of the mike's effective range. but sounds coming from behind the microphone will hardly be heard. This mike is widely used in master control where normally only one person is talking into it.
Bidirectional A bidirectional microphone (FIG. 4) is "live" on the front and back but suppresses sound on the top and sides. It is a useful mike in a studio where two people are talking face to face. It minimizes the ambient sounds but allows more than just one person to talk while maintaining good quality reproduction. It is possible, for example, to have a loud speaker (monitor) turned up with a bidirectional mike and not get feed back noise-provided the speaker is on a dead side of the mike.
Hand-held Mikes
A considerable portion of modern broadcasting involves interviews.
Much of this work is done outside the studio with portable equipment.
When two people have to talk to each other on one directional mike, it might have to be hand-held and moved from one person to another.
Only a mike designed for this purpose should be used (see FIG. 5).
An inexpensive microphone will rattle and produce distracting noises when any portion of it is touched even lightly. Usually a microphone used in this way will be equipped with a windscreen-a plastic foam sleeve that will filter out some of the noise created by wind and other disturbances. When conducting an interview with a hand-held mike there is one important rule to remember. Hold the microphone yourself Do not give it to the person to whom you are talking. If you do, you will lose control of the interview. An overly loquacious individual may not have the sense of timing that you, as a professional, should have. He or she may talk too long, and you might have trouble getting the micro phone back. Holding the mike yourself allows you to get your own comments in, and also makes it possible for you to give the other person direct "cues" so he knows when to talk.
Clip-on Mikes
You may also find it useful to attach a microphone to the person who is talking. The advantage of a clip -on microphone (FIG. 6) is that it will stay with you and still give you use of your hands if you have to move around. It is inconspicuous and often less threatening to a novice who may have anxieties about talking into a microphone. A variation is a lavalier microphone which can be hung around a person's neck. These types of microphones are more commonly used in television, but radio stations find them useful also.
Microphones are very sensitive. They will record and transmit all the sounds they hear-even the ones you may not want them to hear.
Never mumble under your breath or whisper to the person next to you.
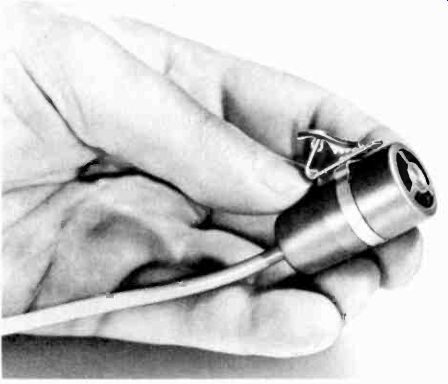
FIG. 6 Clip-on microphone. Model BK 12. (Courtesy RCA.)
The mike will pick up all sub-verbal sounds and inaudible words. The audience will react the same way anyone else does when someone whispers in their presence. They will feel left out.
Checking the Mike
Before you go on the air the microphone must be set at the appropriate volume level. This will be done by the engineer, or by you yourself if you are serving as your own engineer. It is done with the aid of a volume unit meter-commonly referred to as a VU meter (FIG. 7). When you talk into the microphone the needle of the meter should peak at 100 percent modulation. That is the point on the meter just before the shaded area; it is also called zero level. Up to that point on the meter you are getting true reproduction of sound. When the needle goes beyond that point-into the red or dark -shaded area you are only adding distortion. To check the microphone, switch it on, turn up the volume, and talk into the micro phone. The needle will begin to bounce. The volume should be set so that the apex of the bounce is at the start of the red-shaded area on the meter. When you are checking the microphone, speak at the volume you will use when you go on the air, and place yourself in the position you intend to work from. Keep talking until you get a satisfactory reading. If you make just one sound, the needle will bounce up and back and you will not be able to make the necessary adjustments. You can recite some-thing, ad lib, or read copy-it doesn't matter what you say. But do not tap the microphone or blow into it. That is bad for the microphone and does not allow you to set the level.
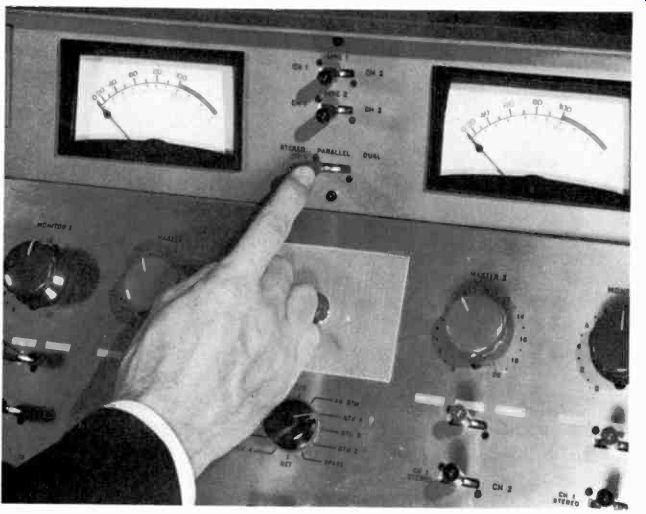
FIG. 7 Volume unit meter. (Courtesy RCA.)
TURNTABLES
There will be at least two turntables in every control room, sometimes three. Each will have an on -off switch and a speed control. Professional turntables start very fast and are designed to reach full speed almost instantaneously. (See FIG. 8.) Cuing a Record Good broadcasting practice requires that you keep your operation tight.
That is, you do not want dead air at any time. Even a few seconds of silence is too much. This means that you have to take up the slack that exists between the time the needle is placed at the start of the groove on the record and the time the music actually begins. This is called cuing the record.
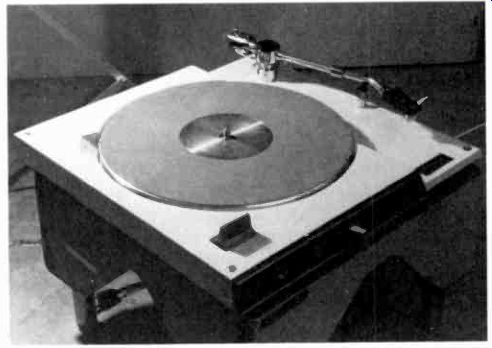
FIG. 8 Turntable. Model GT3-12. (Courtesy Cetec Broadcast Group.)
First you switch on the "cuing amplifier" which will allow you to hear the record without the sound being broadcast. Then put the needle in the groove and turn on the turntable. Stop it when the first sound of the music is heard and back the record off half a turn. The record is now "cued." When you are ready to play it, it will start instantaneously.
Segue When one record ends, you must do something right away to avoid dead air. You may want to open your microphone and talk, but if you have nothing to say you can segue (pronounced SEG-way) right into the next record. That means starting the second one just as the first one ends.
Sometimes the policy of a station is to segue two or three records in a row and then back-announce the entire set. Obviously, this is done more frequently on stations that are not heavy with commercials. (See FIG. 9.)
Cross Fade
A cross fade is similar to a segue except that you do not wait for the first record to end. You start the second record's turntable with its volume control turned down while the first is still playing. You then turn down the volume on the first while turning up the volume on the second. This must be done skillfully, because there is a point in the transition when both records are heard simultaneously. If they are not in harmony, the sound will be cacophonous. (See FIG. 9.)
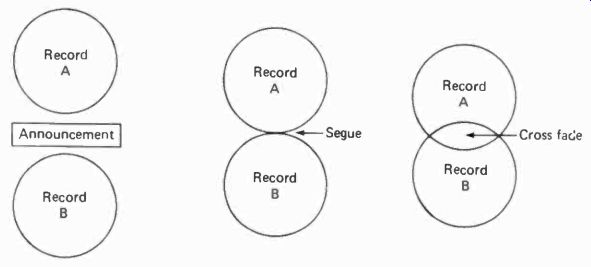
FIG. 9 Cross fade and segue.
Music Under
Sometimes you may want to talk while the music is "under" you. There are two choices: You can start the record at full volume; then turn it down, open your mike and begin talking. Or, you can start talking first; then "sneak" the music in under you. In either case be sure that your voice predominates over the music; otherwise what you say will be lost.
And never talk over a vocal; always use an instrumental selection. Some times the term "voice-over" is used instead of "music under."
Back -timing
In some cases it may be necessary to end a program on the exact second.
For example, you may have to join a network program that starts on the hour. It is very difficult to anticipate precisely when your record will end.
If it goes long you will have to fade it out (turn the volume down), which you may not want to do. An alternative is to back -time the record. Pick a record that has been timed either by the manufacturer or by your station. Let's say it runs 2 minutes and 38 seconds. At exactly that length of time before the hour, you start the turntable with the volume control turned down. Then, when your first record ends, you can talk, close out your program, and as you do, sneak in the back-timed record. It will end exactly on the hour.
TAPE EQUIPMENT
Master control will also be equipped with two reel-to-reel tape recorders (see FIG. 10). One is not enough because you may have to come out of one tape-recorded program and go directly into another. The term "reel-to-reel" is used to distinguish this kind of equipment from cartridge or cassette machines. Cartridges will be discussed later; cassettes are hardly ever used directly in broadcast. Most people have seen home tape recorders and are familiar with them. Professional machines used in broadcasting are basically similar but incorporate certain refinements.
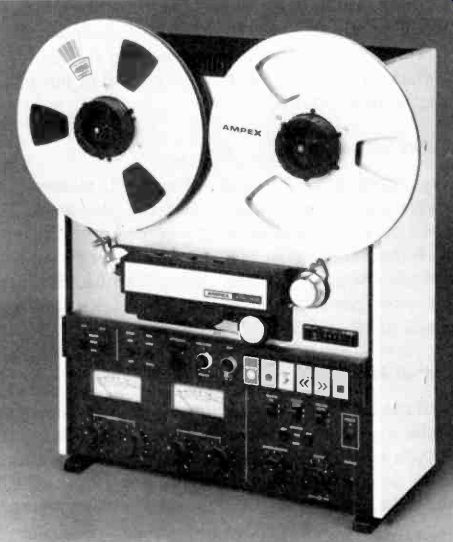
FIG. 10 Reel-to-reel tape recorder. Model ATR-700 (Courtesy Ampex
Corporation.)
[1. The female portion of an electrical connection.]
Speed Control
Tape recorder speeds are measured in inches per second (ips). Some home machines will record as slow as 1 7/8 ips, but a professional broadcast recorder would not be able to play it back. Next is 3 3/4 ips. This is all right to use for long -talk -type programs. It uses up tape at a slower rate, but the fidelity is not as good as it is at the faster speeds. The standard speed for most broadcast tapes is 7 1/2 ips. At this speed the fidelity will be good, and a 7-inch reel of tape will last 30 minutes. (At 3 3/4 ips it will last a full hour.) Some professional machines will play at 15 ips, but this uses up tape very fast, and the improved fidelity is unimportant in most cases.
Direction Controls
All reel-to-reel tape recorders have controls that include play, stop, fast forward, rewind, and record. In conjunction with these may be a counter which advances in number as the tape moves forward. These are useful in locating portions of your program, but you must remember to set the counter on zero when you start. Incidentally, counter readings are usually arbitrary numbers, not minutes and seconds; so they probably will not coincide from one machine to another. The controls on a tape recorder are easy enough to operate. Your tape is erased automatically when you push record. The manufacturer protects you from erasing something accidentally by having you push two buttons instead of just one to put the machine into the record mode.
Record and Play Indicators
Better-quality recorders will be equipped with VU meters or other indicators to enable the operator to set record and play levels. The volume level should be set before you begin to record. To set the level, put the machine in record mode; then talk into the microphone as described earlier. Some recorders will have an "in-out" switch. Set this switch in the record, or source position, and set your levels for recording, but move the switch back to play when you want to play back.
Input and Output Jacks
On one side of the tape recorder will be the input and output jacks.' Their names describe exactly what they do. One input jack will be for the microphone (you are putting your voice in). Another jack may say line in.
This would be used if you want to record something directly from a phonograph, radio, or another tape recorder without going through a microphone. Using a "patch" cord (or jumper) you come out of the output jack in the source equipment and into the line in jack of your tape recorder. Then set the levels just as you did when you were using a microphone, and begin recording. The output jacks might be called line out they could also be called monitor or external speaker. Make sure you have a cord with the correct fittings on it, to mate with the jack you are connecting. There are several different types.
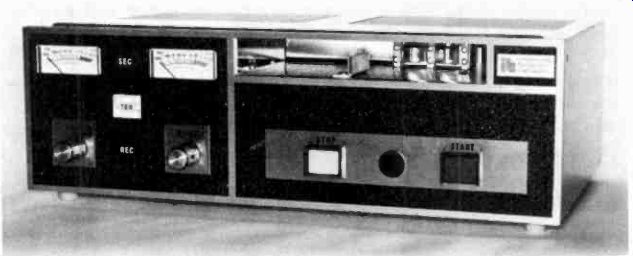
FIG. 11 Cartridge tape recorder. RP Series Recorder Reproducer.
(Courtesy International Tapetronics Corporation.)
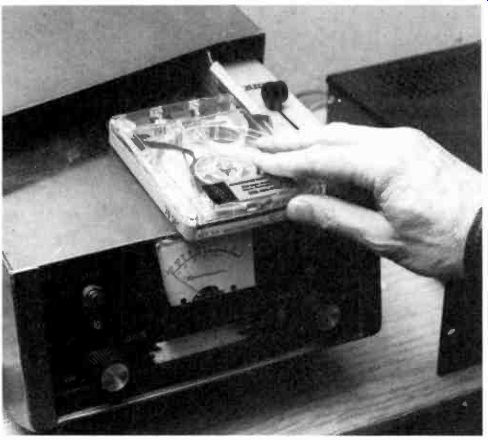
FIG. 12 Tape cartridge. (Photo by Wayne Fogle.)

FIG. 13 Bulk tape eraser
Cartridge Recorders
A piece of equipment that made the disk jockey's life considerably easier is the cartridge recorder, referred to in broadcasting as a cart machine.
(See FIG. 11.) It looks like a home eight -track tape player, but there are a few fundamental differences. A broadcast cart plays at a faster speed, and it does not have a built-in drive wheel. So tapes for the two are not interchangeable. For the most part, carts are used for short spot announcements rather than for music. They come loaded with varying lengths of tape, from 20 seconds to 30 minutes. Most commonly used are the 70-second carts, which are the right length for one-minute spot announcements. Their advantage over reel-to-reel tapes is that they can be taken out and put into the machine much more quickly. (See FIG. 12.) The tape on a cart runs in a continuous loop. An automatic cuing device on the machine causes the tape to stop when it comes around to the beginning of the recorded announcement. Thus, the operator does not have to cue the tape manually, but simply slip it into the machine where it plays right from the beginning at the touch of a button. After the end of the spot, the tape continues to run until it arrives again at the beginning and stops automatically. Then it is ready for the next time it is used. A disadvantage of the cart machine is that it may have no fast forward or rewind function. If it does not, you have to wait for it to recycle. It also has no erase head as does a reel-to-reel recorder. Before recording on a cart, therefore, it must be bulk erased.
Bulk Erasers
A bulk eraser is nothing more than an electromagnet. When it is turned on and a tape of any kind is placed in its electromagnetic field, all sound is erased from the tape. This procedure is always necessary before recording on a cart. It is advisable to do the same thing before recording on reel-to-reel tape. This will eliminate any unwanted, previously recorded sounds that might survive the erase head during the new recording. A word of caution: A bulk tape eraser can damage a watch that is not antimagnetic. FIG. 13 shows a bulk tape eraser.
Audio Console
An audio console is the basic piece of equipment in master control (see FIG. 14). All the other units are connected to it, so that you are able to mix and blend the sounds from each one. A console is sometimes called a board or a mixer. The outputs of turntables, tape recorders, microphones, and cart machines are connected to the console, with a channel switch and a volume control for each one. The volume control is called a pot. Normally master control is shaped in a horseshoe fashion.
As the combo operator you would sit in the center with the console in front of you and the turntables on the sides. If the tape recorders are placed out of reach as they sometimes are, you would have remote control switches conveniently located for easy operation. The microphone would be on an adjustable boom, and you would set it at the appropriate distance. Now you are ready to work.
First, set the level on your microphone. You do this as described before by watching the VU meter on the front of the console. After you have cued your records and tapes, you are ready to go on the air.
Now, open your mike and begin talking. As you do, move your hands into position for your next operation. One hand should be on the switch that starts your turntable; the other hand should be on the pot that controls the volume. When you finish what you are saying, start the turntable and turn up the volume. Immediately check your VU meter to see that the music is at the same level as your voice. Then, turn off the mike. When you have learned to make these moves smoothly, you have become a disk jockey.

FIG. 14 Audio Console. Model BC -7. (Courtesy RCA.)
Note: The first time you do this you will be aware that when the mike is open you will not hear the music in the control room even though it is going out over the air. When the sound from a speaker goes back into a microphone, a squealing noise results, that is called feedback. You may have heard this on public address systems. To prevent it, there is an automatic squelching device on the microphone switch to turn off the speaker in master control when the mike is on. So if you do not hear the music, be quiet until you have checked all your mike switches. You may be sorry if you utter an unairable expletive while you are trying to figure out what is wrong.
PATCH PANEL
There is one more part of master control operation you will have to learn, and that is patching. There are only a limited number of pots on your console; you may want to plug in something that is not part of the basic equipment. For example, you may want to put a phone call directly on the air. A patch panel (FIG. 15) allows you to do this. It consists of several banks of holes, and cords that are called patch cords. One bank of holes will be inputs; another will be outputs. Let's say you want to put the telephone on pot No. 6 which is the one that controls your cart machine.
You take a patch cord and come out of the hole labeled "telephone" and in to the one labeled "pot No. 6." Now pot No. 6 controls the volume of the telephone call on the air, rather than that of the cart machine. You do, of course, have to plan ahead, so that you do not tie up a piece of equipment that you will need later on.
These are the basic moves in combo operation. They may sound easy to learn, and they are. However, there are many refinements that make the job one that requires considerable skill and timing. These you will acquire with experience and the direction of a competent engineer.
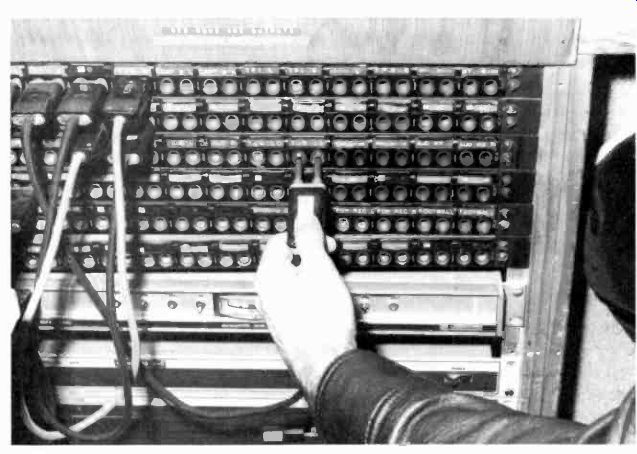
FIG. 15 Patch panel. (Photo by Wayne Fogle.)
REMOTES
Your programming need not, in every case, originate from your own studios. It can come from anywhere the telephone company can install a line. A Class A broadcast line costs about the same as the installation of an ordinary telephone. You must, of course, order it well in advance and be specific about the location of the terminals. The equipment you need is a remote amplifier and mixer. Normally this unit comes with four microphone inputs. You could also attach a turntable to the remote unit.
Picking up a remote simply involves connecting your equipment to the telephone line terminals, plugging in your microphones, and setting them in place. At the main studio you connect the telephone line to one of the output terminals of the patch panel, and patch into any of the channels on the main console. If you are the person at the remote site, you should have one of the microphones and a radio receiver, so you can listen for your cue. The cue should be prearranged and one that is clearly under stood:
"Now here is Bill White at Buck Shaw Stadium in Santa Clara," says the studio announcer, turning up the pot that controls the remote, and you, at the other end, begin talking. With remote units you can pick up sporting events, concerts, lectures, discussions, city council meetings, and a variety of other activities. The fact that the program is live and direct gives it much more appeal than it would have if it were recorded.
RECORDED PROGRAMS
Not all of the programs you hear on the radio are live. In the old days (prior to World War II) the FCC had strict rules about announcing that a program was transcribed. Since then the regulations have been relaxed, because the public has come to expect that much of what they hear will be on tape. Before the age of tape recorders, the programs were produced on large disks called electrical transcriptions. Occasionally we still use the expression ET to mean a program or spot announcement on a record. Tape and carts, however, are much more practical. They are cheaper and can be used over and over.
[2. Another term for "recorded."]
There are several reasons why you would want to produce a pro gram on tape rather than do it live. One is that you can play it again on other occasions. Also, you can stop in the middle if you make a mistake and do a portion of it over. Usually the recorded program uses materials from a variety of sources; doing it live would mean assembling all the people in one place at one time. The program you produce may involve interviews with several different people who have never been in the same room together. You can have all of these on separate tapes and then select the statements from each you think are most relevant. One way to do this would be to dub each statement on to a long cart just as de scribed in making spot announcements. Then you can sit down at the console with records on the turntables, your microphone, and the recorded interviews on the cart machine. You would probably want to have a script or an outline in front of you rather than try to ad lib. From this point on the steps would be something like this:
1 Bulk -erase a reel-to-reel tape, and "thread it up" on the recorder.
2 Start recording, and let the tape run about 30 seconds before you put any sound on it.
3 Start the music at full volume, fade it down, open your mike and read your introduction. Bring the music up briefly; then fade it under and out.
4 Begin your own speech and when you come to a point where you want one of the previously recorded statements, push the start button on the cart machine. Make sure the channel switch is on and the volume is turned up.
5 Continue through the program in this fashion, always watching your VU meter. Be sure that your levels are constant; you want your music and pre-taped interviews at the same volume as your voice.
6. At the end of the program close all the channels and let the reel-to-reel tape continue to record for a full minute. This will assure that any previously recorded material on the tape will be erased. Can you see the problem? If you stopped the tape immediately at the end, and there were other sounds on the tape, what would happen when the tape was played back on the air?
A few words of caution: Make sure to wind back and erase any false starts on the tape. For example, you may start once, make a mistake, and start again. If you leave the first start on the tape, the operator may cue it up to that point when it is put on the air. Remember to label your tape, giving the speed, the length, the date, and your name as producer.
PRODUCTION SPOTS
Sometimes spot announcements will be recorded in a production studio.
A sponsor may want a message that is "produced," perhaps with music, sound effects, and several voices. The recorded spot also assures that the announcement will not be misread on the air. The copy itself might be written by the salesperson or by some other member of the staff. It could also have been prepared by an advertising agency or the parent company of a participating sponsor. The copy would then go to the production or operations director, who might give it to you, as a staff announcer, to record. You might want to read it "straight" without anything added to the copy, or you might wish to dress it up a bit. You could do any of the following:
Use two or more voices to add variety
Read it through an echo chamber
Add recorded music or sound effects
Dramatize it
These embellishments are possible only if the spot is recorded. It may take several tries before you get it the way you want it. It is not unusual to spend several hours producing one 60 -second spot. If the account is going to run frequently and for a long time, you will want to make several different ones for variety. You may want to put them all on the same cart or each on a separate one. Having them on separate carts gives the traffic director the ability to select certain ones for certain times of the day.
When doing production work there are a few things to remember:
Most cart machines do not have an erase head; many do not have fast forward or reverse. This can be an inconvenience. If you are putting three spots on one cart you may get the first two perfectly, and make a mistake on the third. Then you would have to bulk-erase the whole cart and start over. For this reason it is a better plan to record all three spots on reel-to-reel tape first; then dub3 them off onto a cart. When you dub, cue the reel-to-reel tape to the start of the announcement. Then put a bulk -erased cart in the cartridge recorder and put it in record mode. On the console open the channel and turn up the pot that controls the reel to-reel tape. This will connect the output of the reel-to-reel machine to the input of the cart machine. Then start both machines at the same time.
The spot will be recorded on the cart from the very start. When the spot ends, stop the reel-to-reel tape and let the cart machine run until it recycles back to the start of the spot. It will automatically stop at the beginning. You can record as many spots as the cart will contain. When the machine is in record mode, each time you push the start button a cue is placed on the tape. On playback it will always stop at each of those cues.
MUSIC: "ENTRANCE OF THE GLADIATOR"-UP THREE SECONDS AND FADE BARKER: Hurry, Hurry! Step right up folks, the big show is about to begin.
All the action is on the inside.. .
ANNOUNCER: Wait a minute. When it comes to the circus all the action may be on the inside, but the impression you make happens on the outside. Clothes may not "make the man," but they are mighty important and Westgate Men's Wear is going to help you do something about that fall wardrobe of yours. Right now men's corduroy sport coats are on sale at $39.95-contrasting slacks starting at just $14.95. There are sport shirts in a variety of styles and colors that are marked down 30 to 50 percent. The sale will last this week only, so.. .
BARKER: Hurry, Hurry, Hurry! Right this way for the big show. The wild animals will amaze you.. .
ANNOUNCER: . . .And so will the sale items at Westgate Men's Wear-located in the Westgate Shopping Center in Midtown. You'll save a tentful of money, and I'm not lyin'.
SOUND: LION ROAR 3 Transfer material from one recording device to another.
Much of your work at a radio station will involve production. You may spend as many hours in the production studio as you do in master control. In addition to producing commercial and public service announcements, you may also want to make promotion spots for the station. This is generally referred to as station continuity and consists of material on tape that can be played periodically during the day to pro mote particular programs. There is a lot you can do in a production studio. Sometimes it is frustrating when you are unable to get just exactly the effect you want, but it is challenging and always stimulating.
SUMMARY
The equipment you will use in master control at a broadcasting studio is similar to that which you may already have used if you are a hi-fi buff.
One difference is that your home units are probably high impedance while professional broadcasting equipment is low impedance. With practice you will be able to operate the equipment with facility so that you can give full attention to what you are saying on the air. The tools of your trade are the console and patch panel, microphones, turntables, and reel-to-reel and cartridge tape recorders. You will be using both kinds of tape machine in your on -the -air work and in your recorded productions.
TERMINOLOGY
Audio console
Back timing
Bidirectional microphone
Bulk eraser
Cardioid microphone
Cartridge tape recorder (cart machine)
Cart (tape)
Condenser microphone
Cue Cuing amplifier Cross fade Dead air Dynamic (pressure) microphone ET (electrical transcription) False starts Feedback Gain High impedance Input jack Ips (inches per second) Lavalier microphone Level Load Low impedance Master control Mixer Monitor (speaker) Music under Omnidirectional microphone Output jack Patch panel Ribbon (velocity) microphone Segue Unidirectional microphone VU (volume unit) meter Windscreen Zero level
ACTIVITIES
1. Using your home equipment, dub the music from a record onto a reel-to-reel tape. If you have a hi-fi set there are probably jacks in the back labeled "output," "monitor," or "speaker." Possibly there is an earphone jack. Any of these can be used as an output. Attach a cord from one of these to the input of your tape recorder. The input might be labeled "line in" or "aux in." See if there is much loss in fidelity when you dub from the record to the tape.
2. Produce a program of poetry readings. Start by recording several short selections on one reel-to-reel tape. Use different voices if possible: allow a few seconds pause after each selection. Now write an introduction, giving the program a title and a theme. Select instrumental music you think would be appropriate to play under each poem. If you have access to a production studio with an audio console, follow the steps on pages 72 to 73 blending your own voice with the music and the other voices on tape.
3. Record a series of short sound effects on cart. You can produce them "live" with a microphone-by slamming doors and ringing bells, or you can dub them from other recordings. Sit down at the console with your microphone open. Push the button on the cart machine for each sound and see if you can ad lib a reaction to each one. Record the whole procedure on a reel-to-reel tape. Do the same exercise with another set of sound effects that someone else records for you. Keep your cues tight and your responses fast and short.